
Super flaky multi-layered Pheni Paratha recipe with step-wise pictures. This layered Parotta flat bread recipe with multiple layers is easy to make at home!
I love Paratha and it is quite visible from all the different types of Paratha recipes I have shared on this blog. Today I bring to you one of the most delicious, super flaky multi-layered Pheni Paratha. It is quite similar to the Kerala Parotta or Tamilnadu style Barotta recipe or the North style Laccha Paratha. I have already posted both the recipes using whole wheat flour in an attempt to make it as healthy as possible.
Traditionally, parotta or Barotta is made using maida/ all-purpose flour and for once, I wanted to make an authentic recipe, so made Ceylon Parotta using maida. Unlike regular stuffed or plain paratha, which are made using whole wheat flour, this Pheni paratha is made using maida and I am not one bit guilty to have this flaky deliciousness.
I saw this quick video of making flaky, multi-layered Pheni Paratha on Instagram while I was randomly browsing and I had bookmarked it long ago. Recently, I was craving for some junk food and the first thing I remembered was this parotta recipe, ended up making it immediately. I paired it up with Vegetable Salna (next upcoming recipe) and it was out of the world. I love my layered crispy Barotta with thayir pacahadi/onion raita and it was match made in heaven. I have made this a couple more times since and it surely is a hit in my kitchen!
How to make Pheni Paratha | Flaky Layered Parotta
📖 Recipe
Pheni Paratha | Flaky Layered Parotta
MEASUREMENT
1 cup = 250ml, 1 tablespoon = 15ml, 1 teaspoon = 5ml
Ingredients
- 2 cups All Purpose Flour/Maida
- 3 tablespoon Oil/Ghee/Butter
- Salt as needed
- Water as needed
- Oil to Cook Paratha
Instructions
- In a large bowl, add all purpose flour along with salt and 1.5 tablespoon Oil/Ghee/Butter and mix it well. Sprinkle water little by little and knead into soft dough. Add 1 teaspoon of oil on top, rub it well.
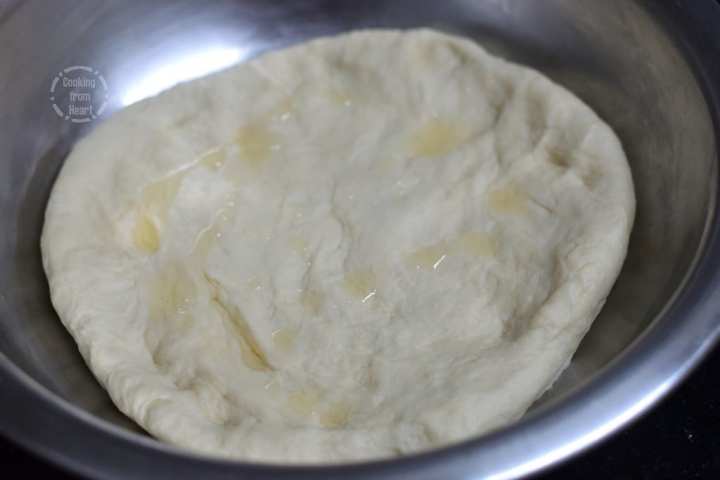
- Let the dough rest for 20 mins to an hour and knead it for a couple of minutes again.
- Split the dough into ⅞ equal parts and add half a teaspoon of oil on top of each ball of dough.
- Take a ball of dough, apply oil on top and spread it thin on clean kitchen counter.
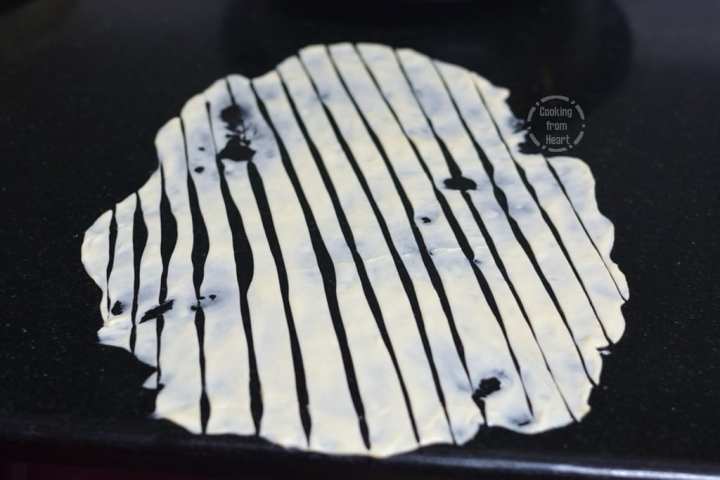
- The dough should be spread as thin as possible, ignore any breaks in between.
- Take a knife and cut the spread dough into thin strips of equal width.
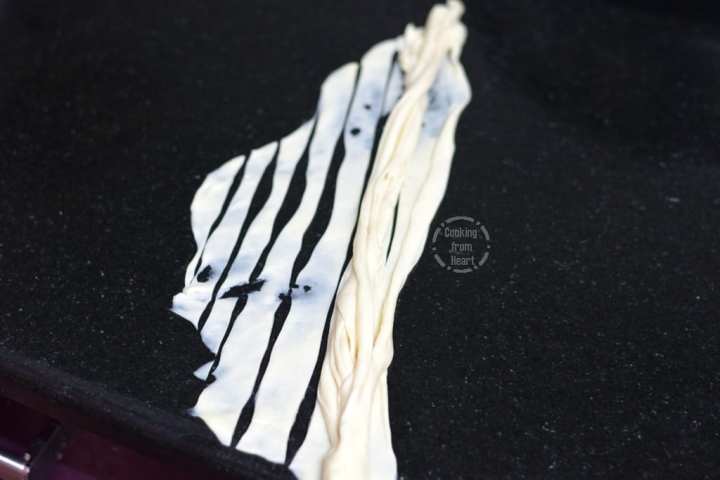
- Begin bringing the strips together from one end to the other.
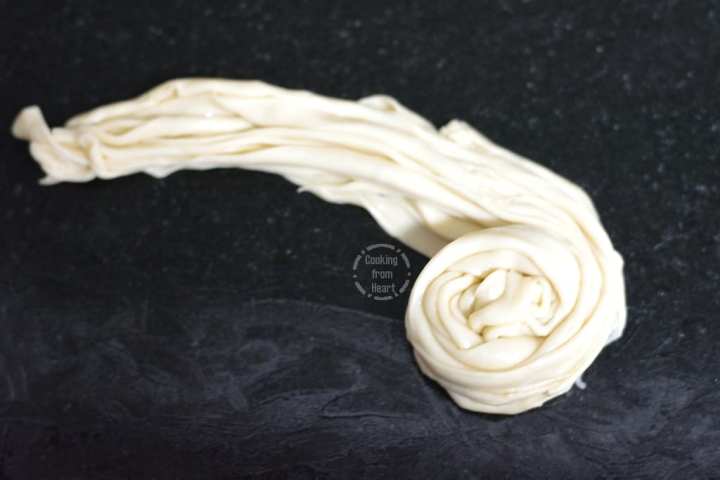
- Now roll the strips into a circle, tucking away the end.
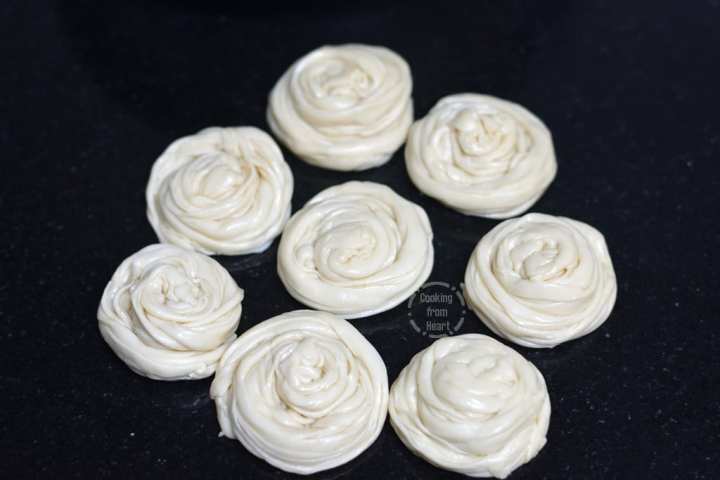
- Repeat this with rest of the dough balls. Apply some oil on top.
- Meanwhile heat iron griddle/pan to cook the parathas on medium flame. On a greased plate, gently press each parotta into circle of 2mm thickness.
- Put the paratha on hot pan and cook for 20-30 secs on each side.
- Drizzle oil around the paratha and cook until there are golden spots all over. Remove from heat. Once all the parathas are cooked, line them up in a stack and press them from both sides. This will help bring out the layers prominently.
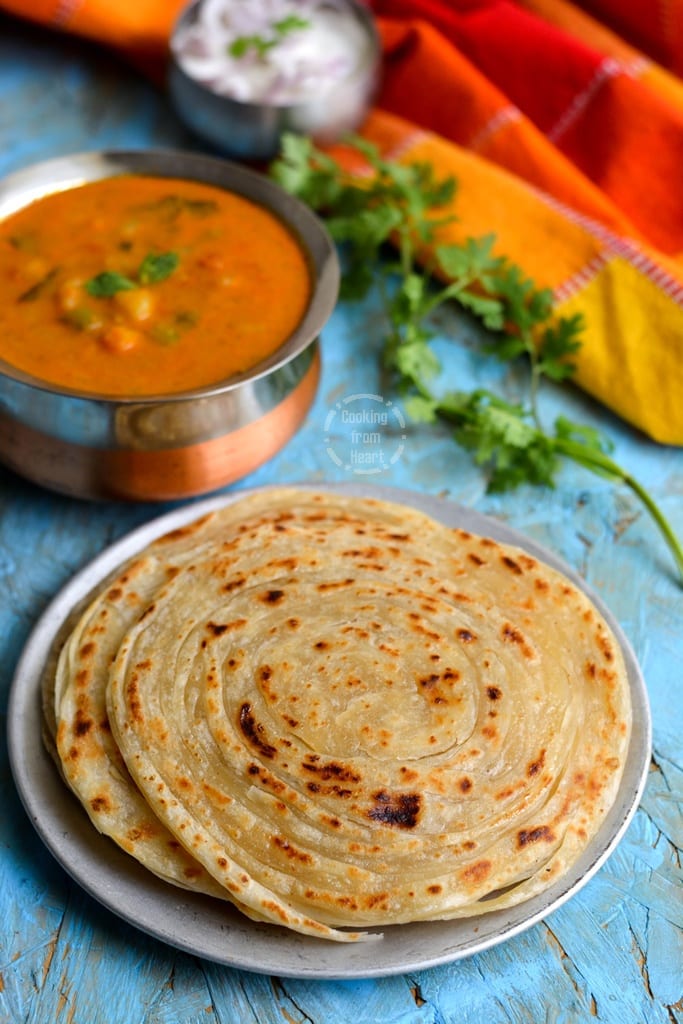
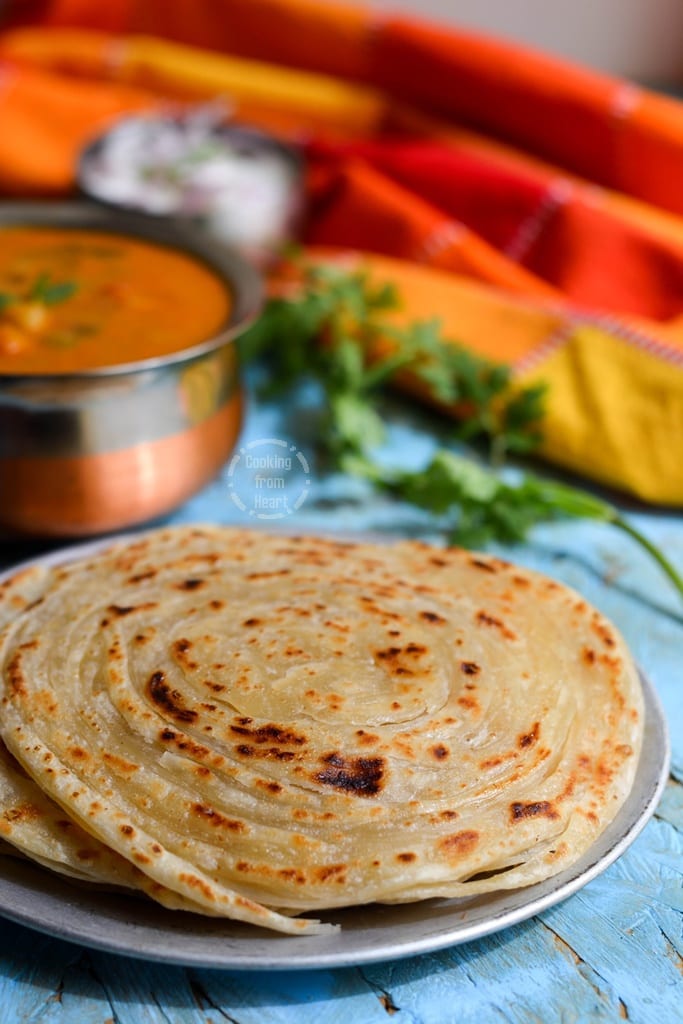
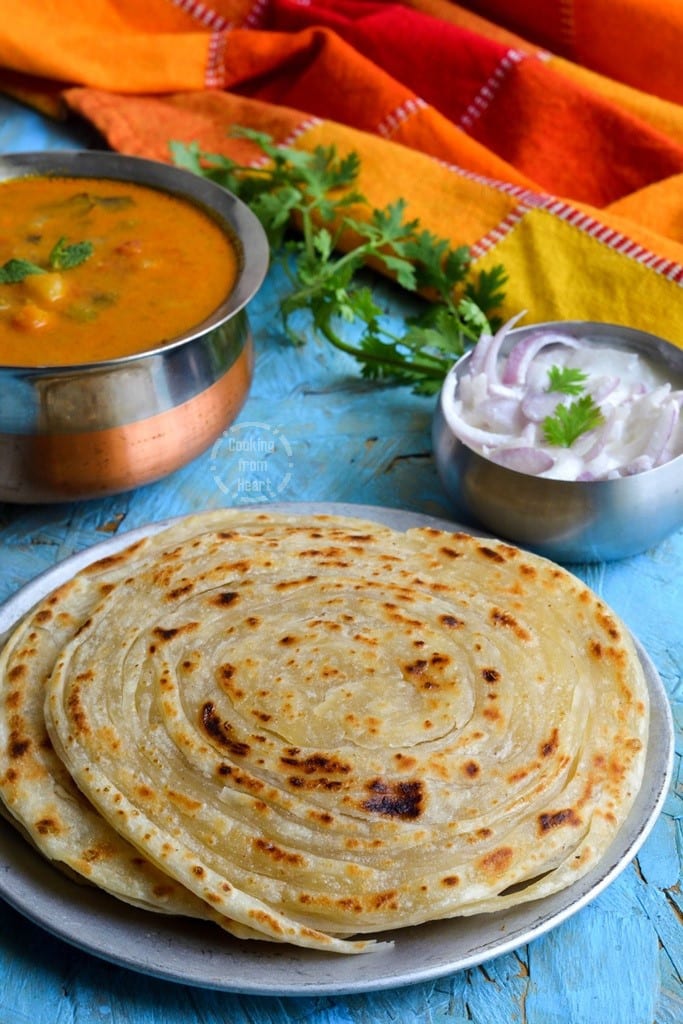
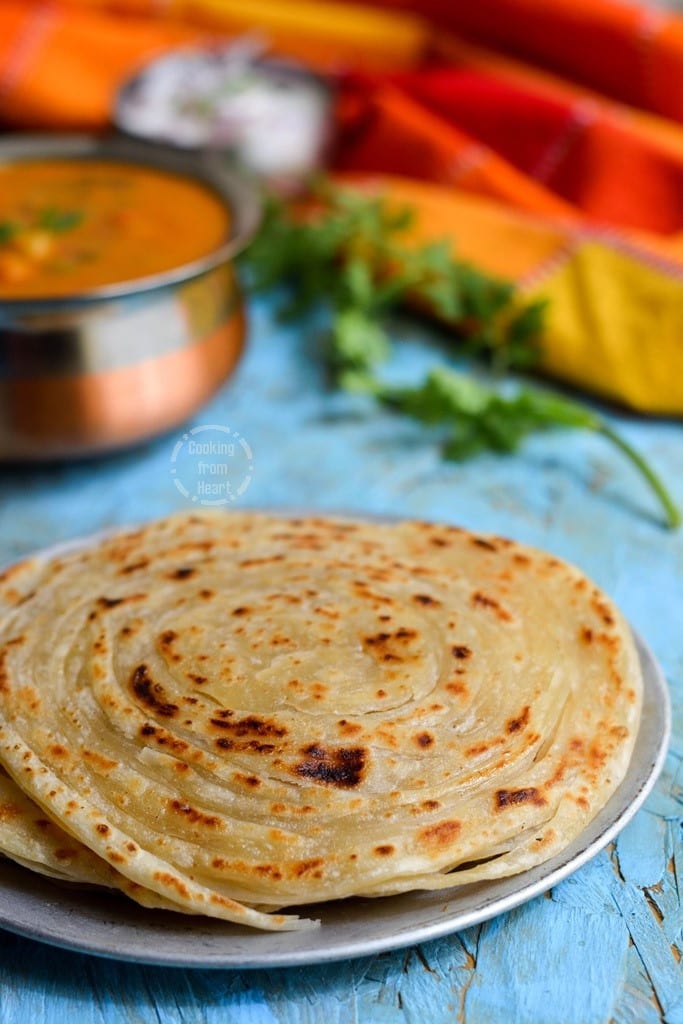
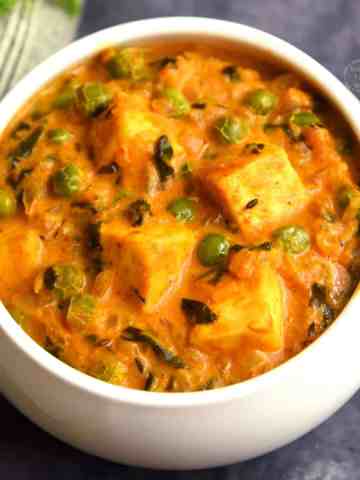
- Serve them hot with any veg curry/gravy and onion raita.

Detailed step-wise picture recipe of making Pheni Paratha | Flaky Layered Parotta
1. In a large bowl, add all purpose flour along with salt and 1.5 tablespoon Oil/Ghee/Butter and mix it well. Sprinkle water little by little and knead into soft dough. Add 1 teaspoon of oil on top, rub it well.
2. Let the dough rest for 20 mins to an hour and knead it for a couple of minutes again.

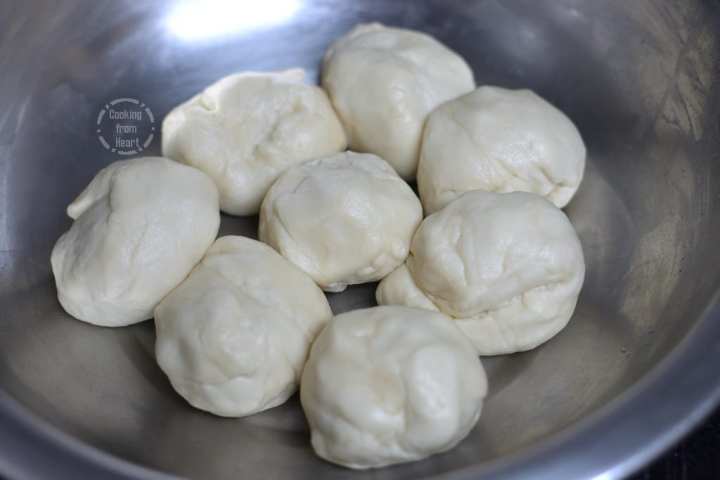
3. Split the dough into ⅞ equal parts and add half a teaspoon of oil on top of each ball of dough.
4. Take a ball of dough, apply oil on top and spread it thin on clean kitchen counter.
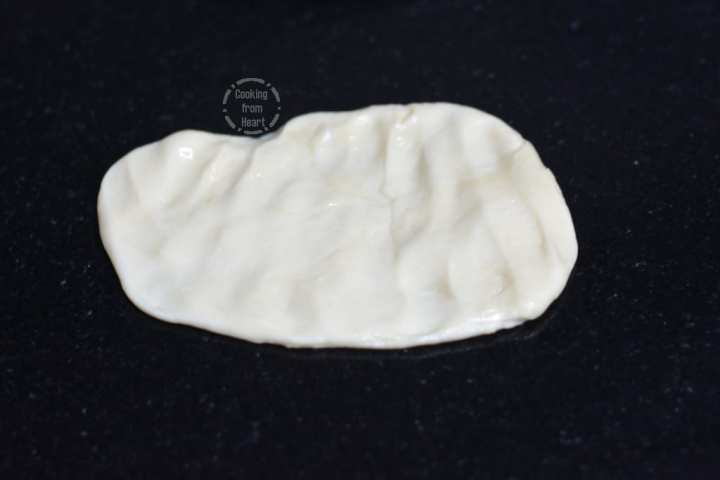
5. The dough should be spread as thin as possible, ignore any breaks in between.
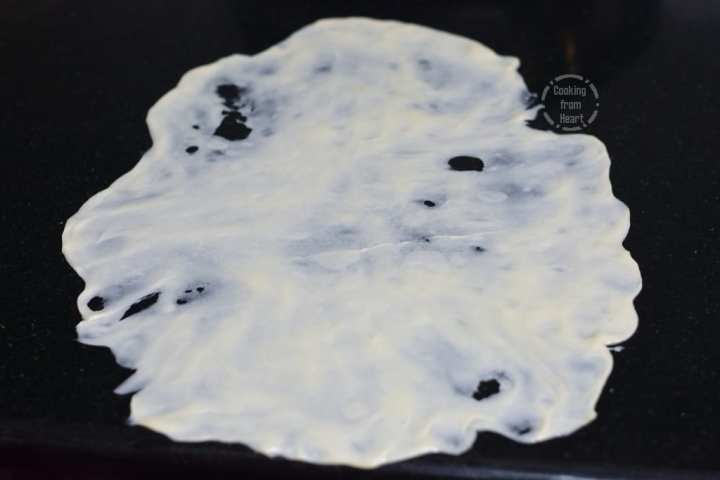
6. Take a knife and cut the spread dough into thin strips of equal width.
7. Begin bringing the strips together from one end to the other.
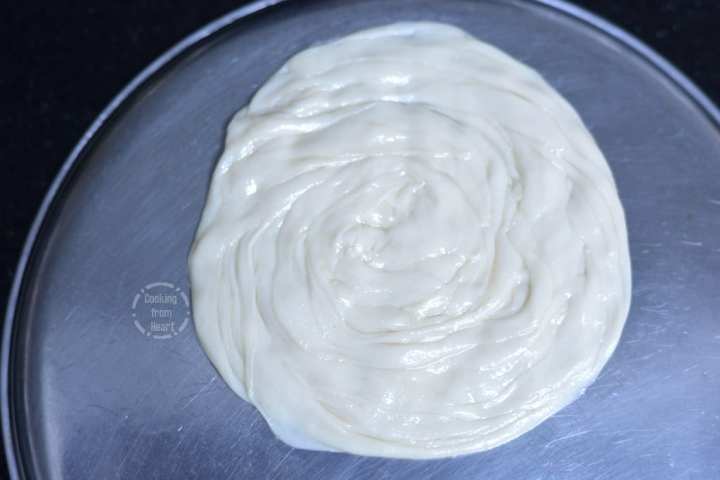
8. Now roll the strips into a circle, tucking away the end.
9. Repeat this with rest of the dough balls. Apply some oil on top.
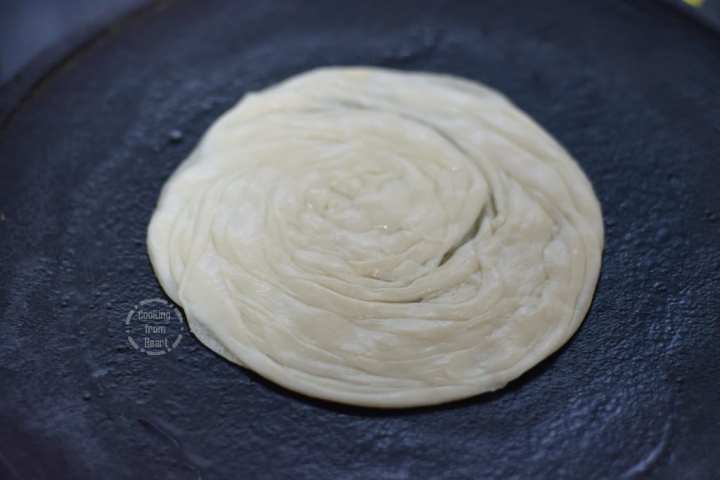
10. Meanwhile heat iron griddle/pan to cook the parathas on medium flame. On a greased plate, gently press each parotta into circle of 2mm thickness.
11. Put the paratha on hot pan and cook for 20-30 secs on each side.
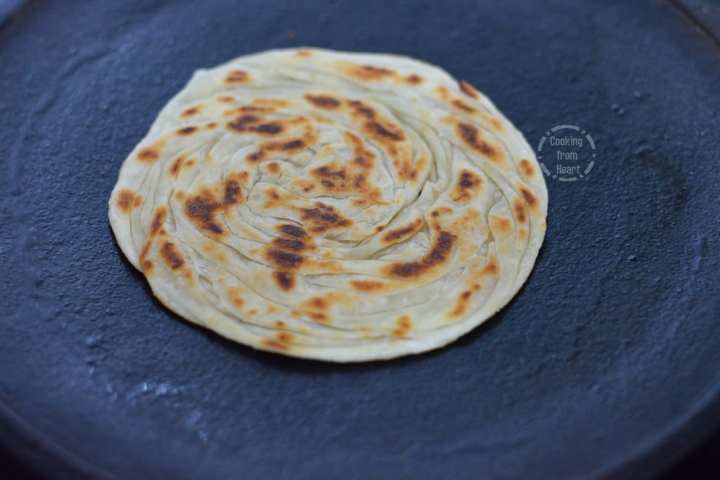
12. Drizzle oil around the paratha and cook until there are golden spots all over. Remove from heat. Once all the parathas are cooked, line them up in a stack and press them from both sides. This will help bring out the layers prominently.
13. Serve them hot with any veg curry/gravy and onion raita.
Recipe Notes
- Cook the parathas on iron tawa so they turn crispy.
- The longer the dough rests, better will be the results.
- For soft version, make the paratha with medium thickness.
I would be delighted to know if you have tried this recipe, don’t forget to share your feedback and comments below. If you have any questions, you can e-mail me! I am also available on Facebook, Pinterest, Instagram and Twitter 🙂
Leave a Comment