
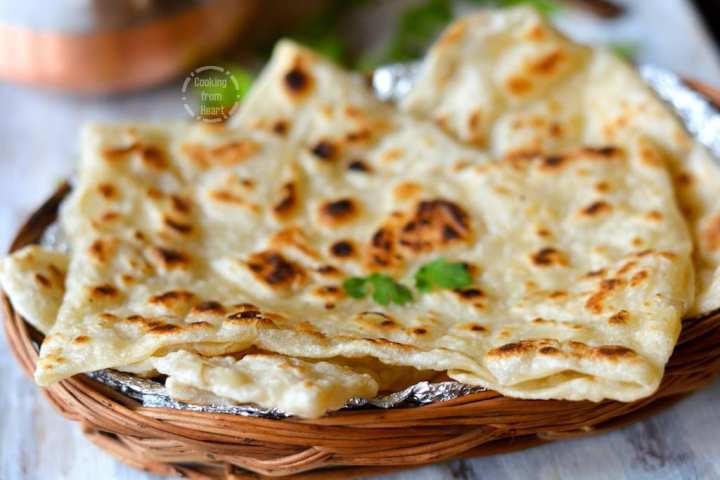
Step-wise picture recipe for a multi-layered, thin, melt in mouth Veechu style Ceylon Parotta – restaurant style recipe that can be made easily at home. Popular Veechu Parotta or Ceylon Parotta recipe with step by step pictures.
There is this image in my mind that I can never erase from my childhood days – Parotta Master (apparently that is how the chef who works this multi-layered flat bread – Parotta is called) expertly spinning and twirling that large sheet of dough as he throws it out of his hand high into the air to expand it a little further every round. That is how this Ceylon Parotta gets its name – Veechu Parotta, for it is thrown (Veechu) into the air. There is at least one such shop in every corner in Tamilnadu and one can spot these parottas anywhere with ease.
It is believed that this Veechu style of Parotta originated in Sri Lanka (called as Ceylon in the olden days) and as people migrated to Tamilnadu, they brought in their rich food heritage which eventually became part and parcel of Tamilnadu too. Although I have seen Parotta (called as Barotta) literally everywhere growing up, I have always played safe trying it out from trusted sources. A lot of oil and all-purpose flour goes into making this Ceylon Parotta and it doesn’t hurt to take a little precaution! But making it at home has its own advantages – you can be sure of the ingredients and how you make it.

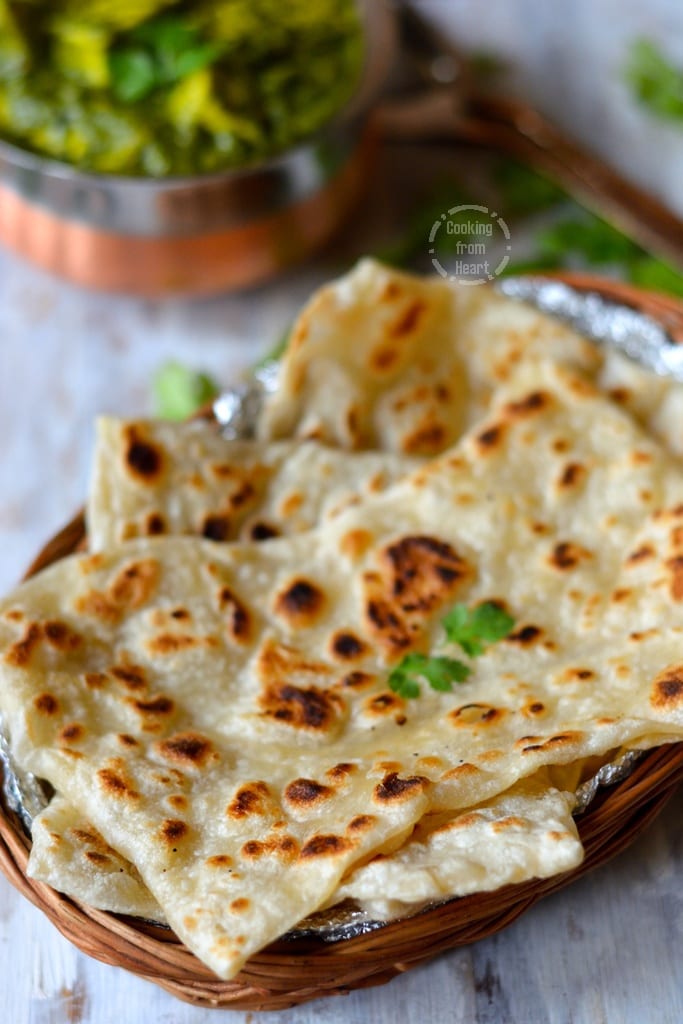
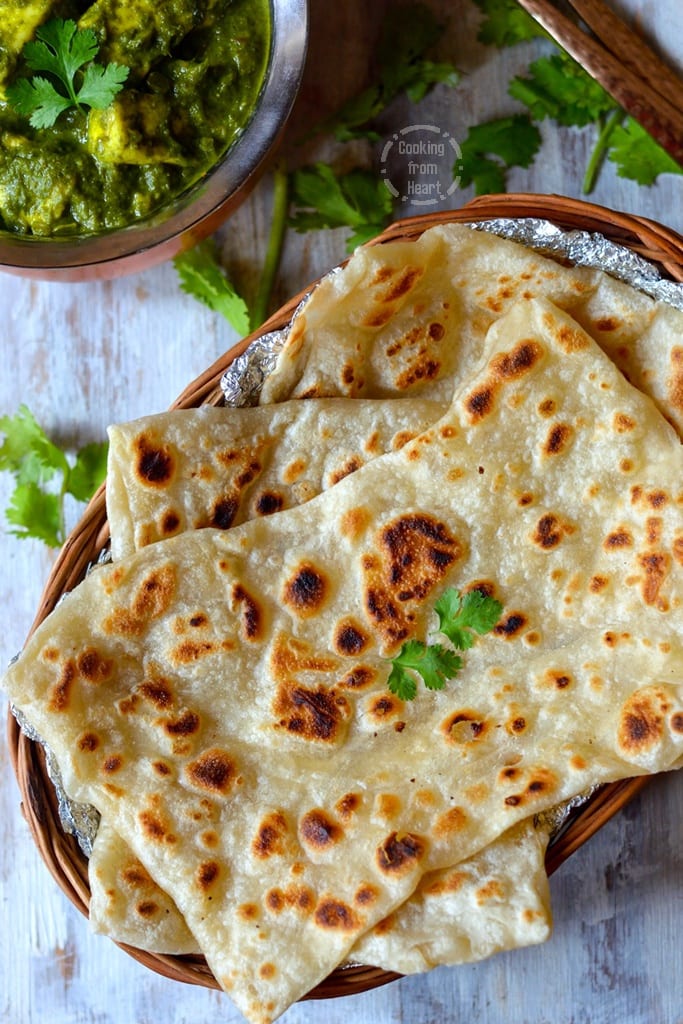
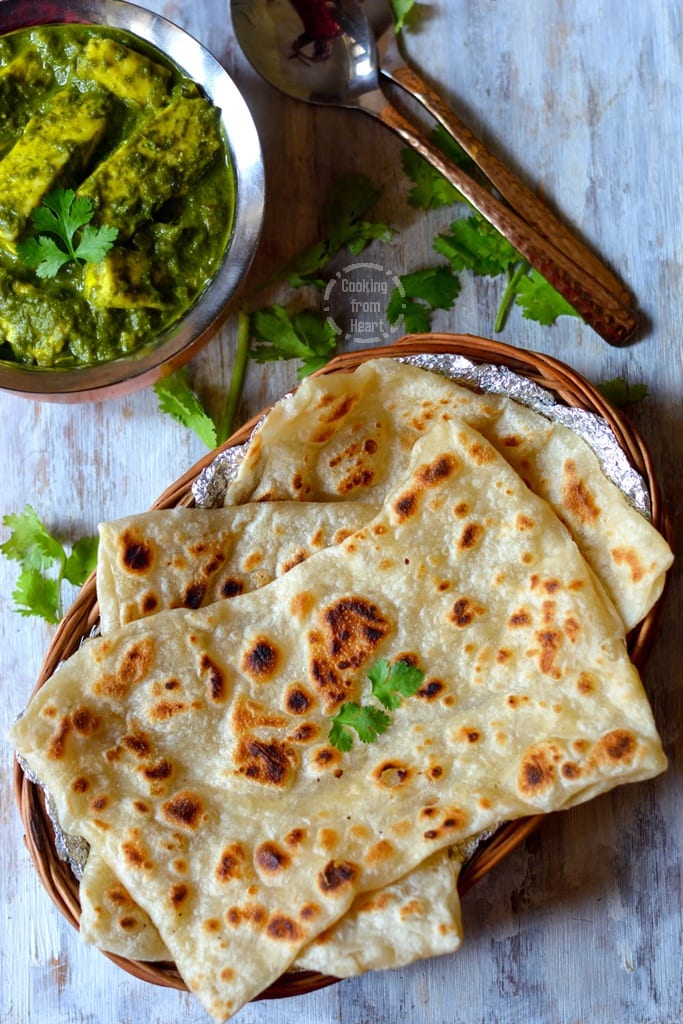
It had been my dream to try making this Ceylon Parotta at home for quite a long time now. The only reason I hadn’t given it a try was because of the process itself. To get that veechu style by throwing the dough into the air is impossible without practice. I was feeling a little experimental recently and tried Cerylon Parotta at home. For the first attempt, it had come out really well. Of course I am not an expert yet with the Veechu but I found a good alternative to make this at home 🙂 This makes a very thin, melt-in-mouth multi-layered flat bread. I served it with a special Paneer gravy and will share the recipe soon. Meanwhile, check these amazing Paneer recipes.
How to make Ceylon Parotta | Veechu Parotta
📖 Recipe
Ceylon Parotta | Veechu Parotta
MEASUREMENT
1 cup = 250ml, 1 tablespoon = 15ml, 1 teaspoon = 5ml
Ingredients
- 2 cups Maida/All-Purpose Flour
- Salt as needed
- Water as needed
- 2 teaspoon Oil + extra for Rolling & Cooking
Instructions
- In a bowl, add all-purpose flour along with salt and pour water little by little, knead it into a soft pliable dough. Add 2 teaspoon of oil on top and knead again for 3-5 mins. Set it aside to rest for 2-5 hrs.
- Squeeze out equal sized balls out of the dough and set them aside.
- Take 2 or 3 balls of dough at a time, apply oil generously all over them and pat then flat, set them aside again until ready to use.
- Take one such flat bread at a time. On a greased kitchen counter, apply oil on top of it and gently spread it over until it is really thin. It is alright if there are a few holes, keep spreading until it is almost transparent. Apply oil as needed to help spread easily.
- Now gently fold on edge towards the center. Repeat the same with the other end as well.
- Now fold both the smaller ends towards the center so that the parotta either looks like a rectangle or square.
- Heat a pan and gently remove this parotta and place it on the hot tawa.
- Drizzle oil all over the parotta. Cook on both sides on low flame until it has golden spots all over.
- Serve hot with any Paneer/Mushroom side dish.
Detailed step by step picture recipe of making Ceylon Parotta | Veechu Parotta
In a bowl, add all-purpose flour along with salt and pour water little by little, knead it into a soft pliable dough. Add 2 teaspoon of oil on top and knead again for 3-5 mins. Set it aside to rest for 2-5 hrs. The longer the dough rests, the easier it will be to spread it without tearing.

Squeeze out equal sized balls out of the dough and set them aside.
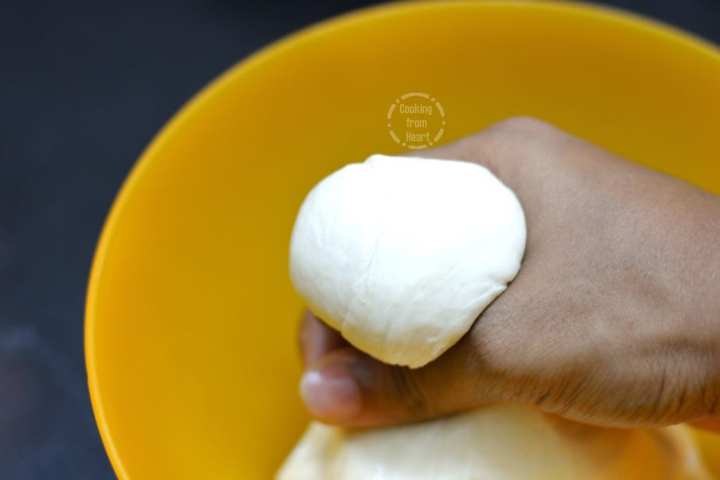
Take 2 or 3 balls of dough at a time, apply oil generously all over them and pat then flat, set them aside again until ready to use.
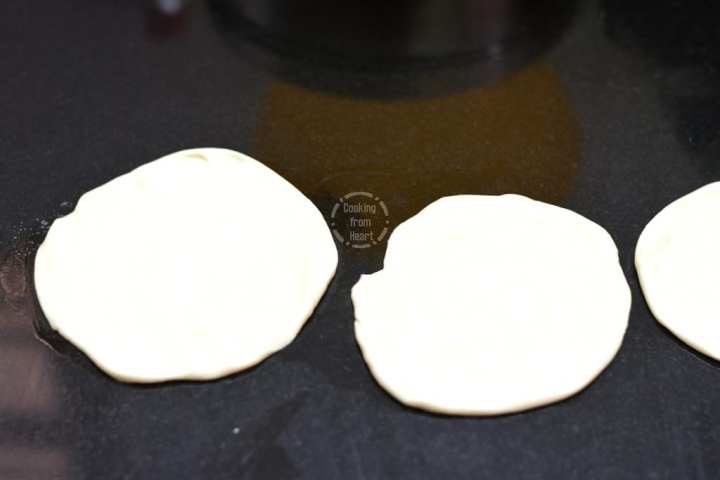
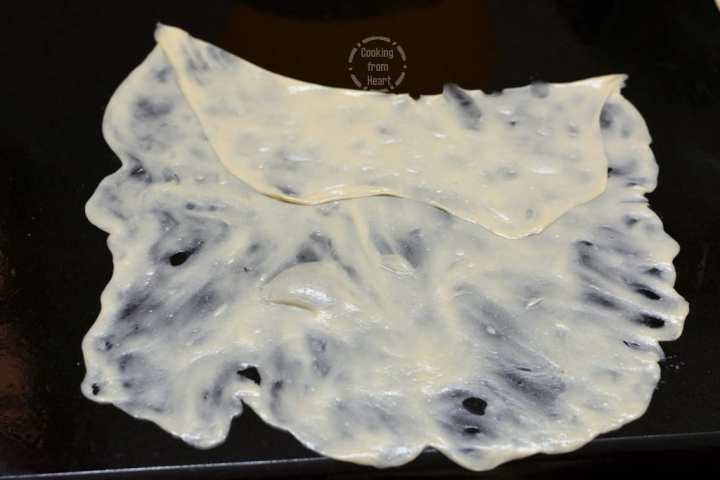
Take one such flat bread at a time. On a greased kitchen counter, apply oil on top of it and gently spread it over until it is really thin. It is alright if there are a few holes, keep spreading until it is almost transparent. Apply oil as needed to help spread easily.

Now gently fold on edge towards the center.
Repeat the same with the other end as well.
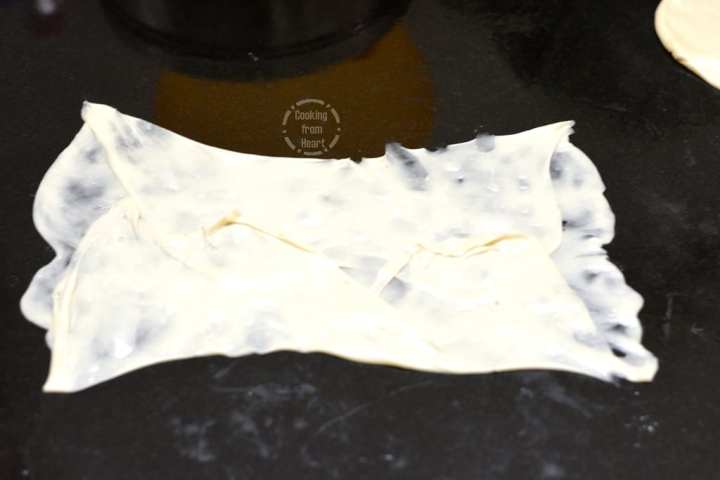
Now fold both the smaller ends towards the center so that the parotta either looks like a rectangle or square.
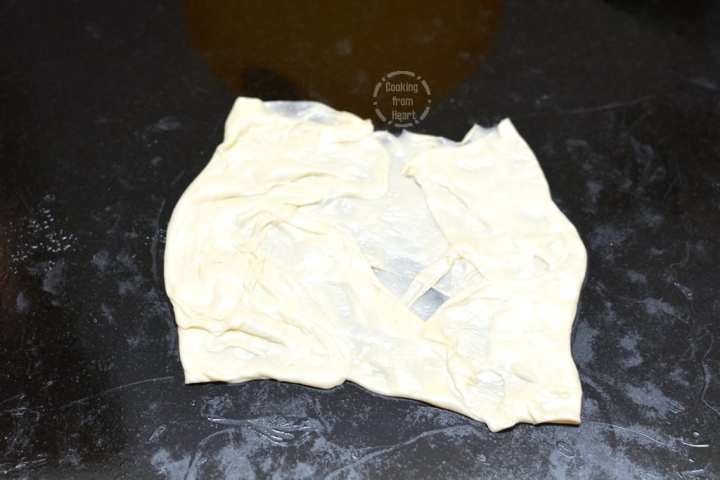
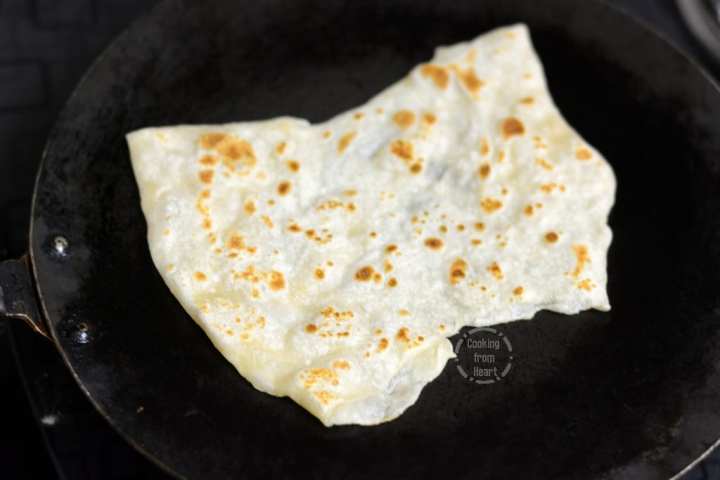
Heat a pan and gently remove this parotta and place it on the hot tawa.

Drizzle oil all over the parotta. Cook on both sides on low flame until it has golden spots all over.
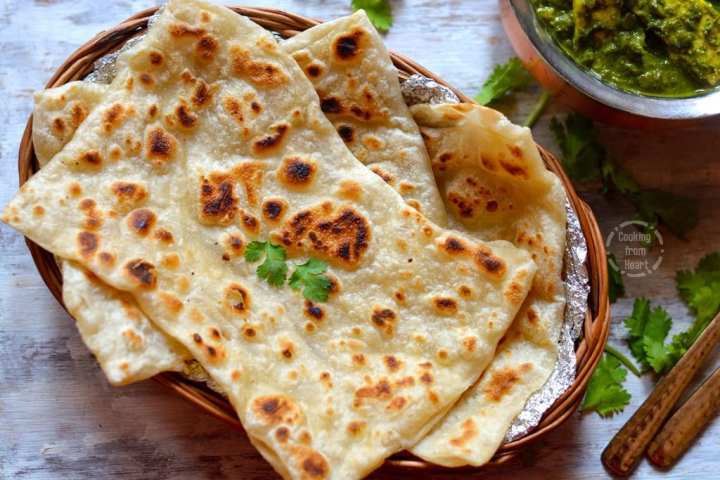
Serve hot with any Paneer/Mushroom side dish.
Recipe Notes
- Oil has to be used generously to spread the roti as thin as possible. Grease the counter with oil as well.
- Ceylon Paratha can be stuffed with vegetables or egg mixture in the center, before folding.
- When served hot, these are very soft and might get stretchy as they cool down.
I would be delighted to know if you have tried this recipe, don’t forget to share your feedback and comments below. If you have any questions, you can e-mail me! I am also available on Facebook, Pinterest, Instagram and Twitter 🙂

Srividhya Gopalakrishnan
Awesome. It's been long time since I made these. Paneer n parotta sounds like a great combo.
chcooks
Thanks Sri 🙂 I will jump over to your blog - been crazy busy and am not getting time at all to check my feed 🙂 You are doing a great job with the marathon as usual!
Suneetha gr
Hi is it okay if use wwf, as I have only that!! This sounds and looks yumm...??
chcooks
Hi Suneetha, thanks a lot 🙂 Unfortunately this needs maida - only then it will stretch and make a transparent layer. If you use WWF, it is impossible to get the dough to stretch without breaking as there is no gluten. However if you really want to use wwf, just roll it as thin as possible (must be easy) and then fold it 🙂 It would still be good to taste, so no worries 🙂
Vanitha
Wow!! Reminds me of this restaurant in Cuddalore where I had tasted one of the best "barottas"! You make it look so easy to make! I have made these with WWF but I guess to taste an authentic parotta, all-purpose flour it is! Thanks for sharing 🙂
chcooks
Thank you so much 🙂