
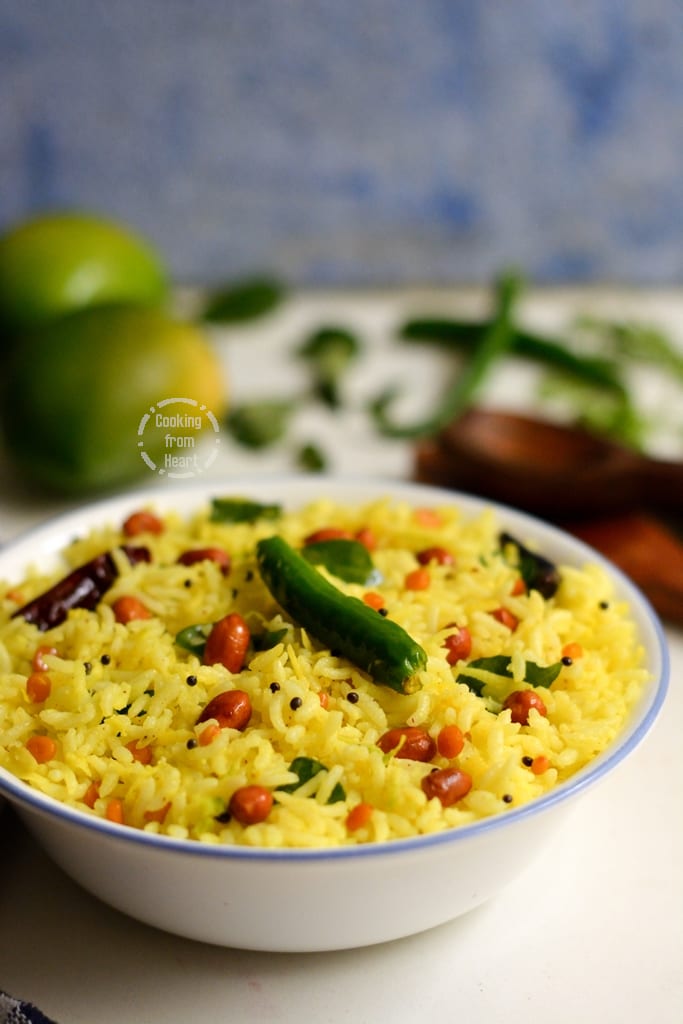
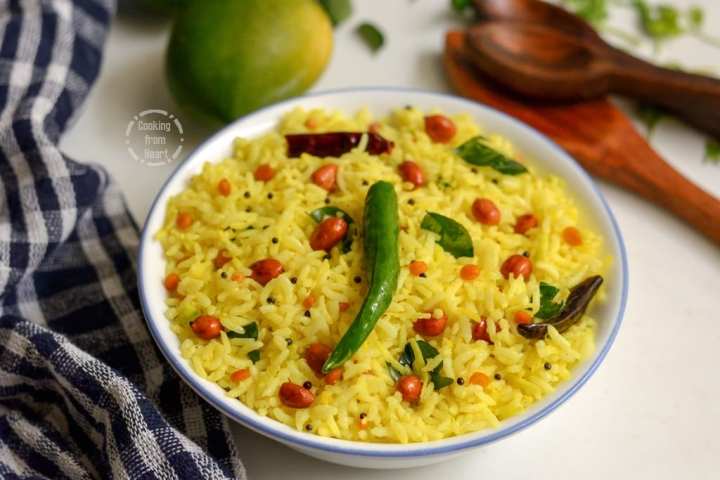
Lip-smacking delicious Mamidikaya Pulihora, Andhra special Mango Rice recipe with step-wise pictures. Make it for an easy lunch or pack it in your luncbox!
Summers are incomplete without making a few traditional raw mango recipes. As much as I love golden yellow and sweet mangoes and making my favorite dessert recipes using the king of all fruits, I just have to make a few savory dishes using green raw mangoes too. I will be honest, I am not a very big fan of tangy unripe/raw mangoes. But still, I usually end up making few of my most favorite dishes if not for the taste but for nostalgia. Mamidikaya Pulihora is one such recipe. It used to be a regular lunch fare growing up and I still love it quite a lot.
Apart from the Mango Rice/Andhra Special Mamidikaya Pulihora, I also end up making one or two mango-based pickles every year. Another staple while the raw mangoes last is Mamidikaya Pappu/ Mango based Dal. With hot rice, ghee and fryums on the side it is one of the most delicious combinations. Anyway, I digress. Coming to the recipe, I am sure every household in Andhra has their own version of this, just like the Chintapandu Pulihora. This recipe is how I have known my mom make it and am sharing the same.
My mom’s version of Mamidikaya Pulihora is not very tangy and that’s probably why I like it the most. It also had some grated coconut in it, adding an additional flavor. It has all the other usual spices and condiments used in Pulihora. The secret to making best Pulihora lies in nicely cooked rice where each grain is separated from one another. Rice cooked to this consistency will ensure that the mamidikaya pulihora stays intact for even a day, making it perfect as travel food or in lunchbox.
How to make Mamidikaya Pulihora | Mango Rice
📖 Recipe
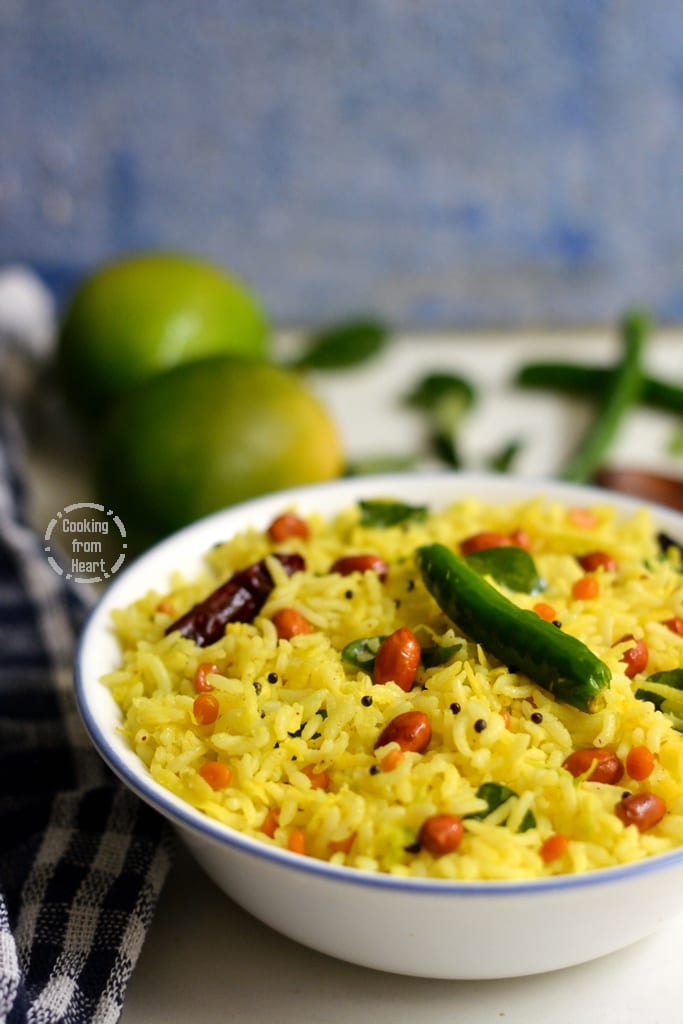
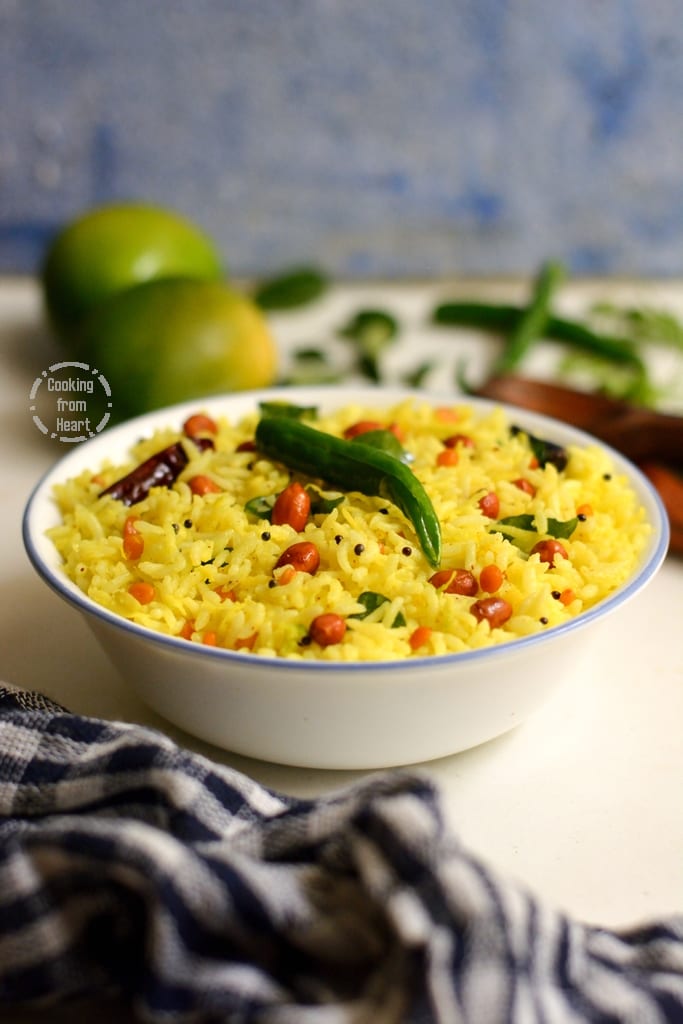
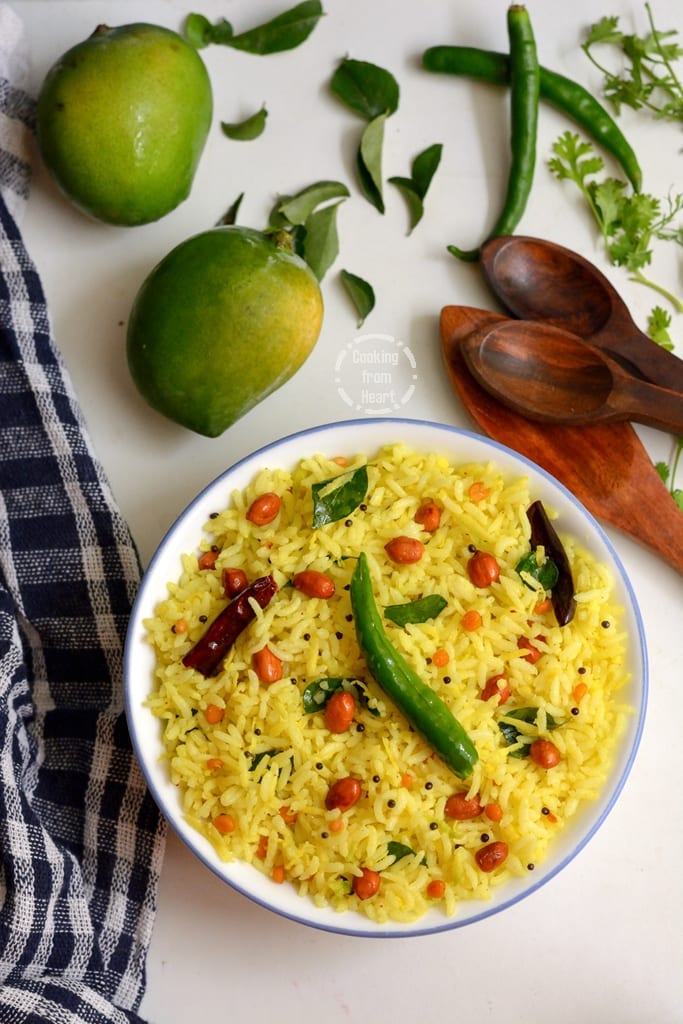
Mamidikaya Pulihora | Mango Rice
MEASUREMENT
1 cup = 250ml, 1 tablespoon = 15ml, 1 teaspoon = 5ml
Ingredients
Main Ingredients -
- 3 cups Cooked Rice each grain should be separate
- 1 cup Grated Raw Mango
- ½ cup Grated Coconut
- ¾ teaspoon Turmeric Powder
- Salt as needed
To Temper –
- 2 tablespoon Gingelly Oil
- 3-4 tablespoon Peanuts
- 1 teaspoon Mustard Seeds
- 1 tablespoon Chana Dal
- 1 tablespoon Urad Dal
- ¼ teaspoon Asafoetida
- 1-2 Dried Red Chillies
- 1-2 Green Chillies
- Few Curry Leaves
Instructions
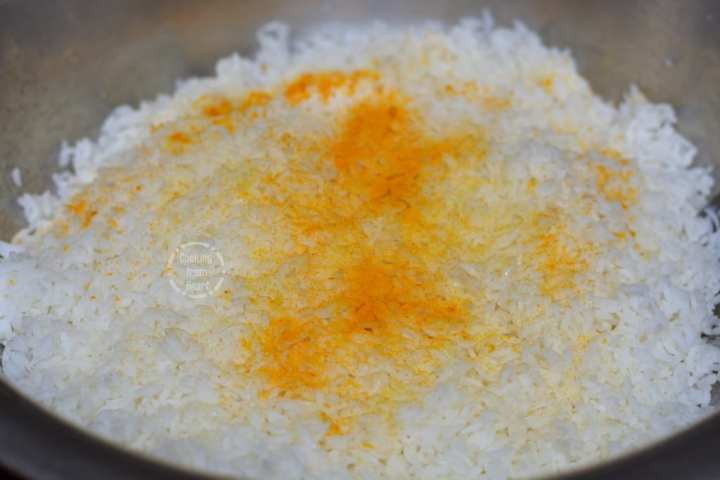
- First cook the rice and spread it on a large vessel/plate to cool down completely. Each grain of rice should be separate.
- Add ½ teaspoon turmeric powder and mix it well with the rice.
- Meanwhile, mix salt and remaining turmeric powder with grated mango and set it aside.
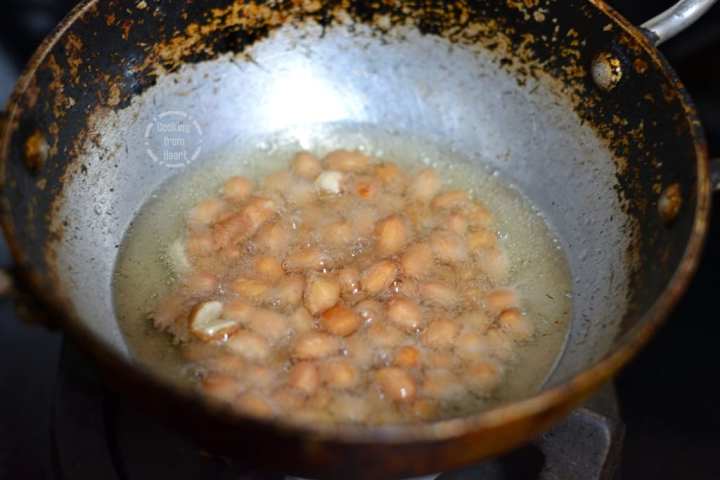
- In a pan, heat oil and roast peanuts until golden. Remove them from the oil and set them aside.
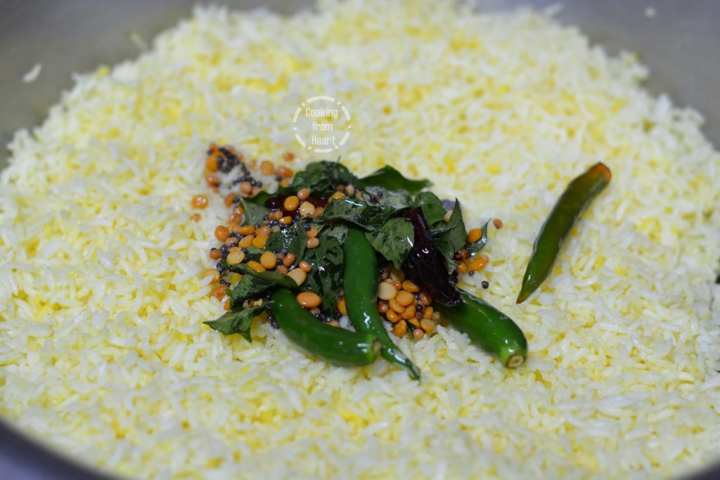
- In the same pan, add mustard seeds, urad dal, chana dal, dried red chillies cut into pieces. As they splutter, add asafoetida.
- Next add slit green chillies and curry leaves. Fry for a minute.
- Add this tempering to the rice. Mix it well.
- In the same pan, dry roast coconut for 2-3 mins until it loses its moisture slightly.
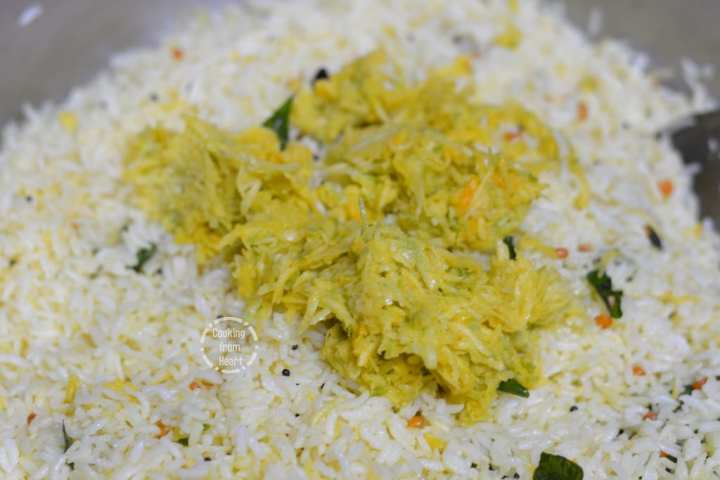
- Meanwhile, mix in the grated mango with the rice.
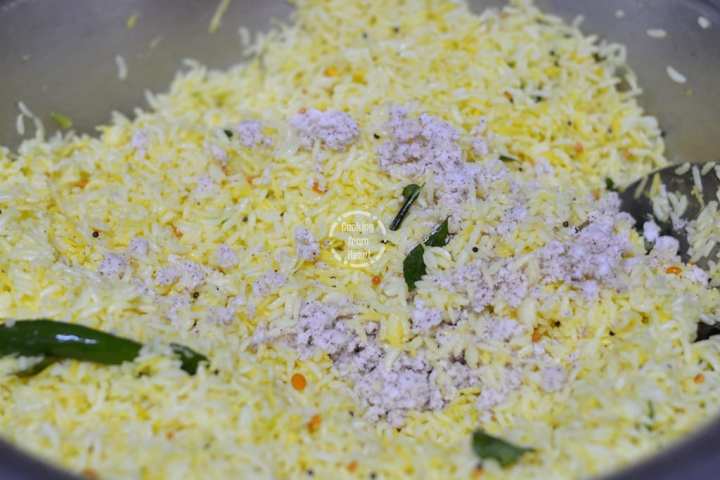
- Next add the coconut to the rice and mix well.
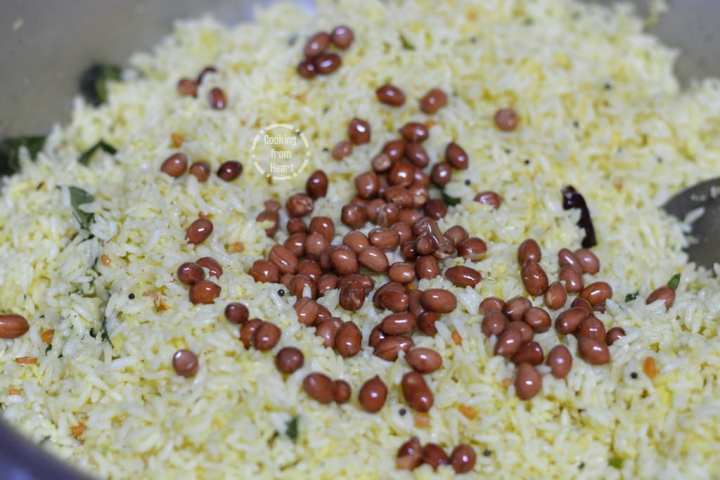
- Finally add roasted peanuts. Mix well.
- Serve with a side of roast potatoes or fryums.
Detailed step-wise picture recipe of making Mamidikaya Pulihora | Mango Rice
1. First cook the rice and spread it on a large vessel/plate to cool down completely. Each grain of rice should be separate.

2. Add ½ teaspoon turmeric powder and mix it well with the rice.
3. Meanwhile, mix salt and remaining turmeric powder with grated mango and set it aside.

4. In a pan, heat oil and roast peanuts until golden. Remove them from the oil and set them aside.
5. In the same pan, add mustard seeds, urad dal, chana dal, dried red chillies cut into pieces. As they splutter, add asafoetida.

6. Next add slit green chillies and curry leaves. Fry for a minute.

7. Add this tempering to the rice. Mix it well.
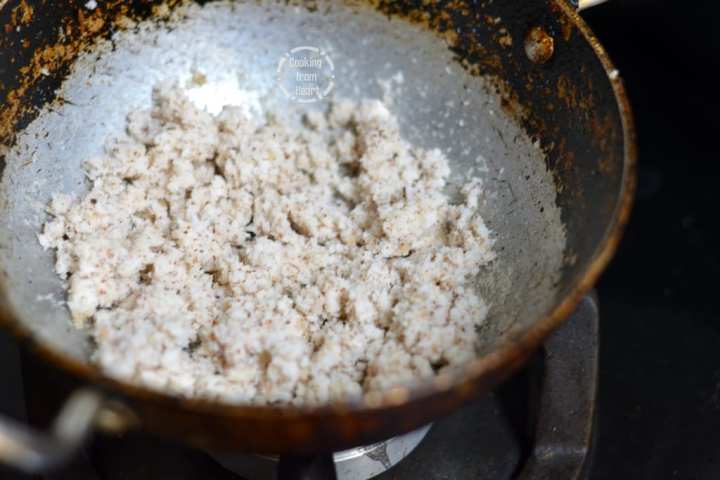
8. In the same pan, dry roast coconut for 2-3 mins until it loses its moisture slightly.
9. Meanwhile, mix in the grated mango with the rice.
10. Next add the coconut to the rice and mix well.
11. Finally add roasted peanuts. Mix well.
12. Serve with a side of roast potatoes or fryums.
Recipe Notes
- I cook 1 cup of rice with 1.5 cups of water to make Pulihora. That way, each grain of rice stays separate.
- Increase the quantity of grated mango for tangier flavor.
- You can avoid coconut if taking it on travel or if you intend to eat it after a day.
- I always add peanuts at the end so that they retain their crunch.
I would be delighted to know if you have tried this recipe, don’t forget to share your feedback and comments below. If you have any questions, you can e-mail me! I am also available on Facebook, Pinterest, Instagram and Twitter 🙂

Leave a Comment